The journal
What is the best grip for dumbbells? Practical guidance for safe lifts
Learn how to grip dumbbells correctly for safer lifts and better performance, with step by step cues, common fixes and short progressions.

Quick answer: Which grip should you use and why it matters
Short practical recommendation - how to grip dumbbells correctly
Default to a neutral grip with the palms facing each other for most dumbbell work, because it balances load transfer, keeps the wrist aligned, and reduces awkward torque through the forearm. A neutral grip is usually the easiest starting point for presses, rows and carries, and it is a reliable cue for recreational lifters and trainers alike.
Use a simple hand cue: hold the handle across the base of the fingers, keep the wrist stacked over the forearm, and think of drawing the handle toward the heel of your palm rather than squeezing through the fingertips. This places the load through the forearm and upper arm while keeping the wrist neutral and stable.
What is the best grip for dumbbells?
A neutral grip is the best default choice for most dumbbell exercises because it keeps the wrist aligned, reduces torque through the forearm, and supports safer force transfer; use pronated or supinated grips selectively to emphasize specific muscles or when mobility allows.
If your shoulders or wrists tolerate rotation and you need more forearm or biceps emphasis, move to a supinated or pronated grip selectively. But the neutral grip is the safe, default choice to reduce strain and simplify technique for most exercises.
Why grip choice matters: the way you hold the dumbbell influences how force travels from the hand through the wrist to the forearm and shoulder. A small change in wrist alignment can shift effort between muscle groups, change lever arms at the elbow, and alter how heavy a load feels. For those managing wrist discomfort or elbow irritation, starting from a neutral grip often lets you maintain range of motion with less pain while still working the target muscle.
Grip types explained in plain language
Pronated grip, supinated grip, and neutral grip
Pronated grip means the palms face down or toward the floor for many standing or bent-over movements, and it shifts emphasis toward the back of the forearm and the posterior shoulder. Use a pronated grip for movements where you want more posterior chain or upper-back involvement. For lat emphasis, some sources discuss specific hand orientations for greater lat engagement: lats.
A supinated grip has the palms facing up. It is commonly used for biceps curls. Choose a comfortable wrist position and reduce the load if control is poor. For an example of the neutral alternative, see ACE hammer curl technique.
Neutral grip keeps the palms facing each other and is often the most wrist-friendly choice. It creates a straight line from the wrist through the forearm and reduces internal rotation at the shoulder, which is why it works well for presses, rows, and carries.
Hook grip and false grip: what they feel like
Hook grip means the thumb is tucked under the fingers around the handle, so the fingers and thumb lock together. Lifters use it when they want a secure hold without an overly tight forearm squeeze, and it can be useful for heavy holds or certain pulling variations.
False grip, sometimes called a thumbless grip, places the thumb on the same side as the fingers instead of wrapped around the handle. It can change the feel of a press or row by shortening the lever between the handle and the wrist, but it also reduces security and can increase risk if you lose control of the weight, so use it with caution.
Hand width and knuckle orientation
Where you place your hands along the handle matters. A wider hand position increases the moment arm at the shoulder for presses and can reduce the effective range of motion, while a narrower hand positions the load closer to the midline and often increases travel. Small shifts in knuckle orientation, such as angling the wrist slightly outward or inward, change which muscle fibers are emphasized and how the wrist feels.
Practical cue: align the middle knuckles so they point forward for most presses and rows, and adjust hand width until the movement feels smooth without pinching at the wrist. If the wrist rounds or collapses, narrow the grip or switch to a neutral orientation to restore comfort.

How to grip dumbbells correctly for the most common exercises
Rows and presses
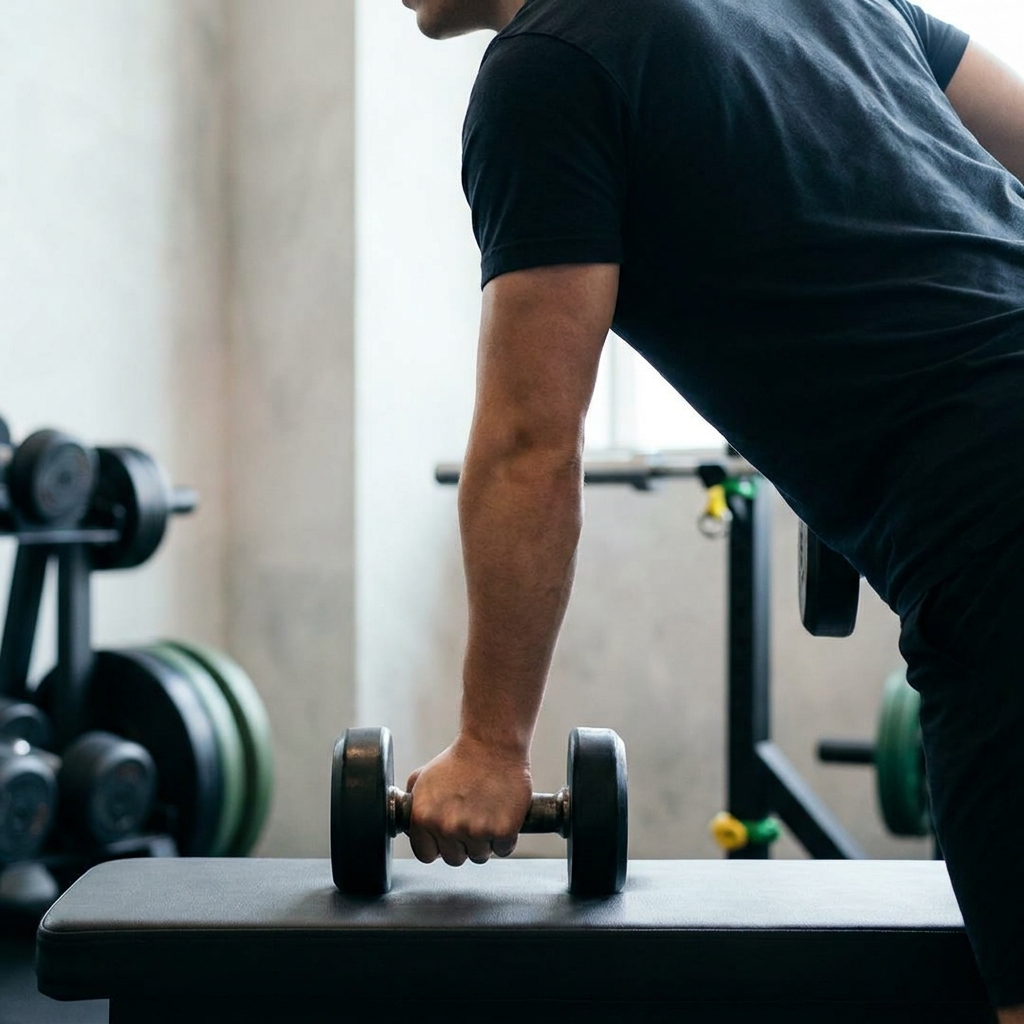
Rows: For single-arm dumbbell rows, place the dumbbell handle across the base of your fingers with the thumb wrapped around for security. Keep the wrist neutral so the knuckles do not point straight up or down, and pull by driving the elbow back while keeping the shoulder blade engaged. A neutral grip will reduce wrist torque and usually allows a fuller contraction of the lats and mid-back.
Presses: For flat or incline dumbbell presses, use a neutral or slightly turned-in grip to protect the shoulder and wrist. Set the dumbbells so the handles sit over the heel of the palm, wrists stacked over the forearms, and press in a path that keeps the elbows at a moderate angle, not flared wide or pinned to the ribs. This keeps force moving through the arm in a stable line.
For overhead presses, a neutral grip may limit range of motion compared with a pronated grip, but it often reduces discomfort for those with shoulder irritability. If you can press safely with a pronated grip and your shoulder feels stable, that option allows a more natural bar-like press, but start lighter and focus on smooth wrist alignment. See the overhead press entry for technique options: overhead presses.
Curls and triceps movements
Curls: For dumbbell curls, a supinated grip directly targets the biceps. Use a full grip with the handle seated at the heel of the palm, wrist neutral at the bottom and slightly supinated at the top, and avoid letting the wrist excessively flex or extend during the lift. If wrist strain appears, switch to a neutral hammer curl to shift emphasis and reduce torque.
Triceps: For overhead triceps extensions, hold a single dumbbell with both hands or use two dumbbells with a neutral grip. Keep the elbows tracking and the wrist stacked so the handle does not pull the wrist into extension. For skull crushers or lying triceps work, position the hands so the dumbbells do not contact the forehead; maintain a firm but not crushing grip to let the triceps do the work without gripping tension interfering.
Squat and carry variations
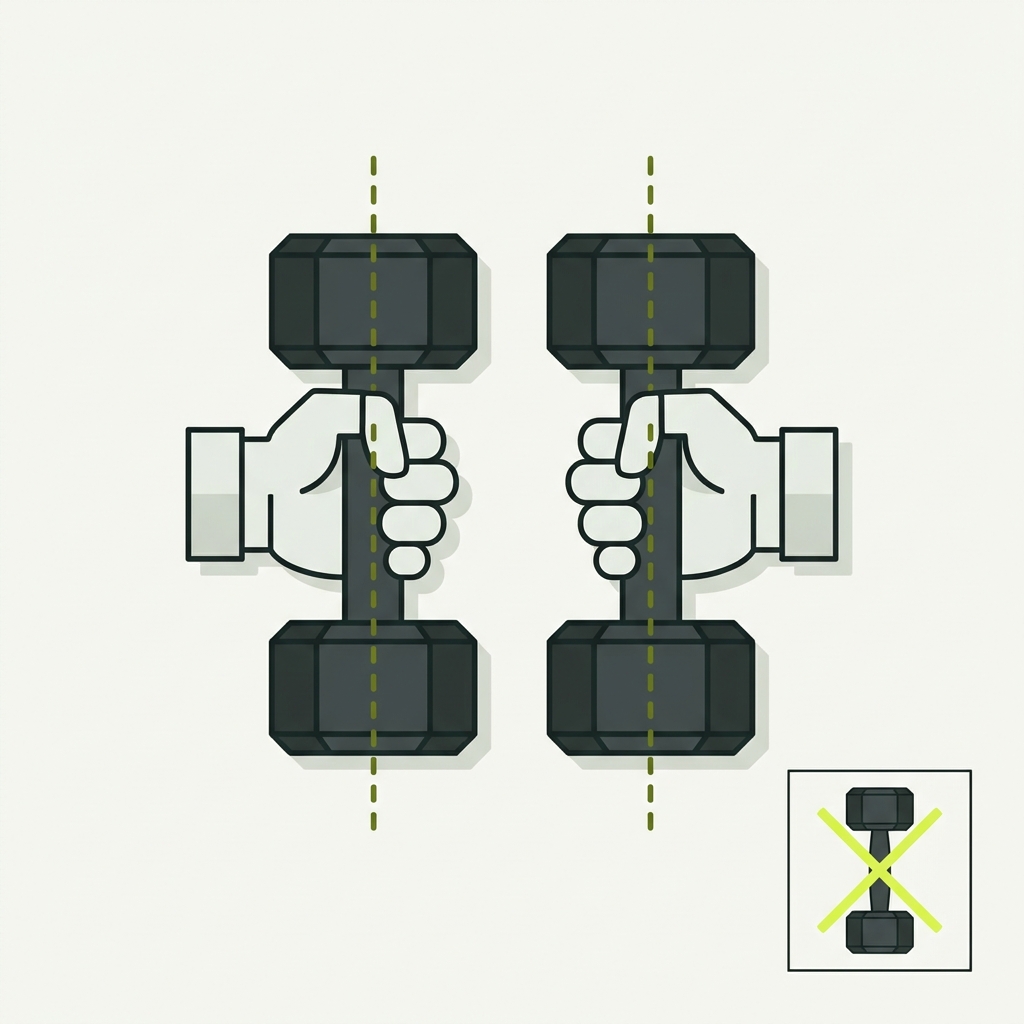
Goblet squat: Hold the dumbbell vertical with the head near your chest and the handle down. Support the handle against the heel of the palm with fingers around the shaft and thumbs providing stabilizing pressure. Keep the wrists neutral by tucking the elbows and letting the weight rest against the sternum rather than fighting it in the fingers.
Farmer's carry: Use a full grip with the thumb wrapped for security. Stand tall with the weight hanging at your sides, shoulders engaged and the wrist stacked over the forearm. A neutral grip helps maintain wrist alignment during long carries and reduces fatigue compared with pronated orientations.
Decision framework: choosing the right grip for your goal or limitation
Goals matrix: strength, hypertrophy, endurance, rehabilitation
Strength: If the goal is maximal strength for a given movement, choose the grip that lets you recruit the most motor units without pain. For many compound lifts with dumbbells, that will be a neutral or pronated grip depending on the exercise and the lifter's mobility.
Hypertrophy: For muscle size, pick the grip that provides the best mind-muscle connection and range of motion. For biceps work this often means supinated curls, while for lats a pronated or neutral row may create a fuller stretch and contraction.
When to prioritize comfort over maximum load
Prioritize comfort when a grip produces joint pain, persistent wrist soreness, or consistent loss of range of motion. Comfort first means you can train more consistently; if a pronated press causes shoulder irritation, switch to neutral for several weeks and track symptoms before returning to heavier pronated work.
Test for problems with two quick checks: perform a light set of the exercise with the suspect grip for 10 to 15 controlled reps and note any sharp pain or unusual crepitus. If pain appears, stop and switch grips or reduce range of motion. If discomfort persists across grips and lighter loads, seek professional advice.
How to test what works for you
Simple progressive test: pick three grips for a single exercise and perform a matched set with a light weight and consistent tempo. Compare comfort, range of motion and perceived effort. Do this across two sessions before deciding which grip to prioritize in your program.
Progression advice: when switching grips, reduce load by 10 to 20 percent for the first week and focus on technical repetition before increasing weight. That avoids sudden overload on small stabilizer muscles that were not previously trained in that orientation.
Common mistakes and troubleshooting
Wrist collapse and how to fix it
Wrist collapse looks like the wrist bending forward or backward so the handle is not stacked over the forearm. Correct it by repositioning the handle to sit over the base of the fingers and cueing to push the knuckles into a vertical line over the forearm. For many exercises, lightly tensing the forearm to create a stable column prevents the wrist from folding under load.
If collapse persists, drop the weight and practice holds with a neutral grip until you can maintain a stacked wrist for 20 to 30 seconds. Then reintroduce movement slowly, focusing on solid wrist alignment each rep.
Gripping too tight or too loose
Gripping too tight compresses the forearm unnecessarily and can limit speed and fluidity in dynamic moves. If you find your forearms burning early, lighten the grip pressure slightly while keeping the handle secure. A firm but relaxed hold often improves endurance and lets target muscles do more work.
Conversely, a grip that is too loose risks losing control of the dumbbell and changing the movement path. For heavy lifts or carries, wrap the thumb around the handle and use a secure full grip to protect yourself and maintain consistent technique.
Using the wrong grip for a specific exercise
Applying a pronated grip to a movement that needs wrist rotation may limit range and cause compensations elsewhere. If you notice shoulder shrugging, elbow flaring, or torso leaning when you change grips, return to the grip that restores smooth mechanics and reassess whether mobility or strength limitations are driving the issue.
If a grip causes spreading pain or referred pain down the arm, stop that variation, test with lighter loads and consider consulting a clinician if pain continues despite modifications.
Practical examples: sample sets and progressions you can try
Beginner to intermediate sample sessions
Sample workout A - beginner: 1) Goblet squat, 3 sets of 8-10, neutral grip; 2) Dumbbell bench press, 3 sets of 8-10, neutral or slightly turned-in grip; 3) One-arm dumbbell row, 3 sets of 8-10, neutral grip. Use a weight that allows controlled tempo and focus on wrist alignment for every rep.
Sample workout B - intermediate: 1) Split-stance dumbbell Romanian deadlift, 3 sets of 6-8, pronated or neutral grip; 2) Seated dumbbell press, 4 sets of 6-8, neutral to pronated depending on shoulder comfort; 3) Alternating supinated curls, 3 sets of 10, supinated grip at peak contraction.
Grip-focused progressions for strength and size
Four week progression: Week 1 - practice the default neutral grip for all compound moves and reduce load by 10 percent if changing from a different grip; Week 2 - add two weekly sets of grip holds or farmer walks for 20 to 30 seconds; Week 3 - introduce one session where you use the targeted grip for accessory lifts only; Week 4 - attempt heavier compound sets with the new grip while keeping volume steady.
Track comfort and training consistency rather than chasing immediate load increases. Small steady improvements in grip comfort and wrist alignment compound into better technique and higher loads over months rather than days.
Short checklists to use mid workout
Midset checklist: 1) Are the wrists stacked over the forearms? 2) Is the handle seated at the base of the fingers? 3) Is the thumb providing security without dominating tension? If any answer is no, pause, reset hand placement and resume with lighter load.
Use this short routine between sets to self-correct before fatigue sets in. Re-checking grip during a session prevents small errors from becoming ingrained technique faults.
Wrap up: main takeaways and safe next steps
Concise summary
Main takeaway: start with a neutral grip for most dumbbell work, keep the handle at the base of the fingers, and maintain wrist alignment to reduce unnecessary strain and transfer force efficiently.
When to see a professional: persistent joint pain, tingling, or weakness that does not improve with brief modifications should be evaluated by a clinician or qualified coach to rule out underlying issues and get tailored advice.
Quick daily drill to check wrist alignment during lifts
Daily drills to maintain wrist mobility include gentle wrist circles, controlled wrist flexion and extension with light resistance, and holds in neutral grip for 20 to 30 seconds. These simple practices keep the joint supple and make it easier to hold proper alignment during heavier work.
Final encouragement: small, consistent attention to grip and wrist alignment will reduce pain risk and improve the quality of your lifts. Try the sample progressions and use the midset checklist to turn awareness into reliable technique.
Frequently asked questions
Is neutral grip always safest for dumbbells?
Neutral grip is a reliable default for many exercises because it reduces wrist torque and often improves shoulder comfort, but it is not always optimal for every single movement depending on individual mobility and goals.
When should I use a supinated grip?
Use a supinated grip when you want to emphasize the biceps or front forearm, such as in curls, but switch to neutral if you feel joint pain or excessive elbow stress.
How do I stop my wrist from collapsing during presses?
Seat the handle at the base of your fingers, keep the wrist stacked over the forearm, reduce load if needed, and practice static holds until you can maintain alignment under tension.
Make grip work a routine part of your training log: note which grip you used and any wrist or joint feedback after sessions. Small, consistent adjustments—rather than sudden changes in load—are the most effective path to safer, stronger lifts. If you have ongoing pain, stop the offending variation and consult a clinician or qualified coach to get a personalized assessment and plan.
References
- https://repandrange.com/workouts
- https://repandrange.com/workouts/exercise-atlas/goblet-squat
- https://repandrange.com/workouts/exercise-atlas/overhead-press
- https://www.innatefit.com/the-best-grip-for-lats-growth-unlocking-your-backs-full-potential
- ACE hammer curl technique
- https://www.gracebrownfitness.com/strong-words/grips-what-are-they-and-how-to-stop-grip-strength-from-holding-you-back-xsnye
Product options for this topic
As an Amazon Associate I earn from qualifying purchases. These are researched options, not hands-on test results. Check the exact size or model, current price and availability on Amazon.
| Product option | Fit and limits to check | Retailer |
|---|---|---|
| CAP rubber-coated hex dumbbells, 10 lb pair | A pair of fixed-weight dumbbells for exercises suited to this load. Choose weight for your current ability; a single pair will not cover every exercise or progression. | View on Amazon |